Dressage is a sport all about perfection, fluidity, and being one with the horse. That leads to the question: How do I Edit Perfect Dressage Photos? That is where this nifty post comes in. To have a beautifully edited photo, you need to have a good base to start on. Within this post, you will learn about shapes to look for and the basic editing to make your equine photos professional.
What Makes a Good Dressage Photo?
The best photographs highlight how well a horse moves: how much lift it gets off the floor and how much it flexes its joints at various points in the stride. In lower-level competitions, do not expect the grand movements and gestures as seen by Dressage sensations Carl Hester or Lottie Fry. Instead, look for lines.
Take a look at the image below to understand what to look for:
If you know nothing about horse riding or are new to the sport, look for lines and symmetry. All other composition rules apply to sport too, but bear in mind these certain aspects:
Red – The legs are reaching, balance and show a wide range of motion. Having the legs straight is more visually appealing for a profile shot as it shows balance.
Yellow – The horse is balanced and holding itself in a frame. The horse is a rectangle and is not leaning on its front or back.
Green – The horse is near behind the vertical. You are ideally looking for a perpendicular line.
How to Edit Perfect Dressage Photos
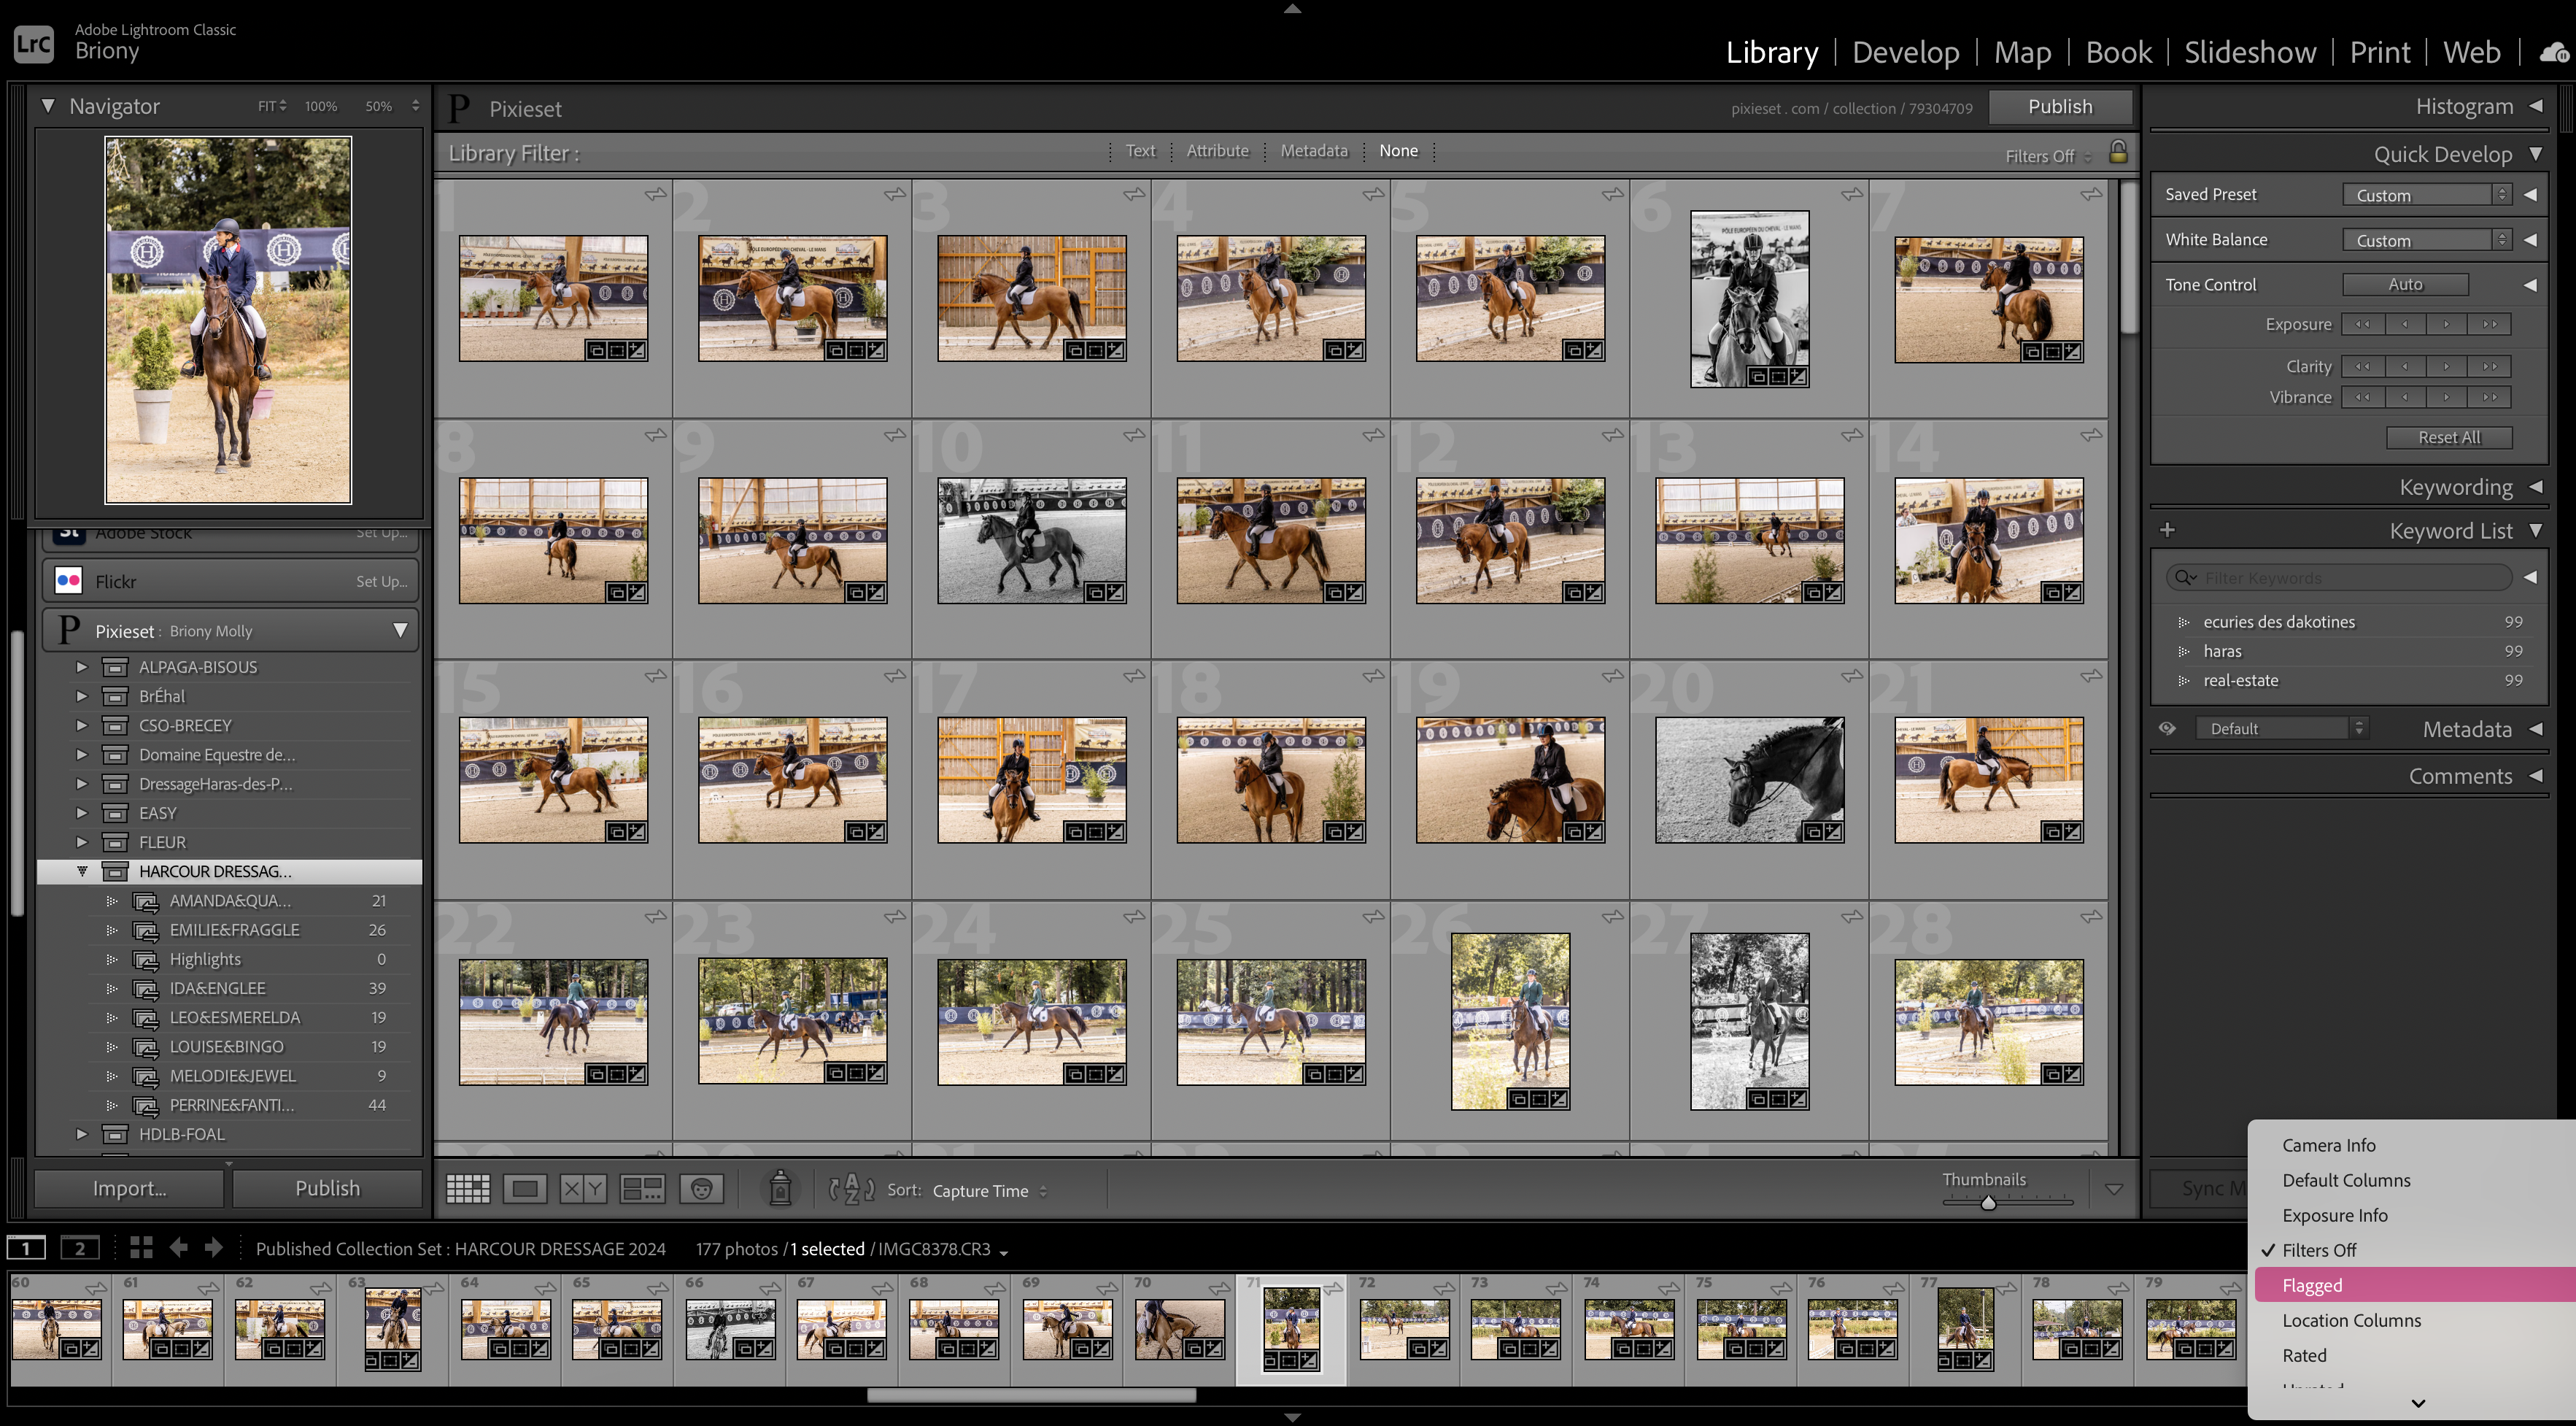
Editing flow varies from person to person. Personally, I use Adobe Creative Cloud, most notably Lightroom Classic. When it comes to sports photography, I personally like to make my picks first and then edit. In lightroom, I use the colour label and flag features to make my first picks and the export picks.
Once I have made the picks I then like to think mainly about the following:
White Balance Horse coat colour Background
Setting the white balance first makes it easier to work with the image. You can do this with the auto, or by selecting a neutral colour with the picker tool. After this, make sure the lens corrections are on and off we go!
The Horse coat colour will be the main focus of editing. For a grey, it is easier to bring out the contrasts, the muscles and the details. A black horse or darker bay horse, it is more complicated to bring out details. For the darker horses, I like to use the shadow slider and brush tool to really bring out the details. As seen in the example below:
The background of an image is equally as important. Make sure there is nothing that takes away from the subject. If you can be aware of this while taking photos, even better. However, sometimes garish backgrounds can not be avoided. The easiest thing to do to help this is to create a de-sharpening mask. You can do this by using the “subject select” tool and then select invert. Use the texture, clarity, and sharpness sliders to create the desired effect.
Easy Dressage Lightroom Preset
You can try this yourself, or try out some premade presets to help you on mastering editing.
My last set of Equestrian presets are seeming to be super popular, so I have created a new pack full of different presets to enhance Dressage images. Presets are suitable for all Equine sports, but be aware they are specifically with the discipline of dressage in mind.
To add presets to your lightroom library, simply exact the zip folder and Import the presets via File>Import Develop Profiles and Presets…
For extracting the zip folder on an iPad, you will need to download an app for this capability or extract it on a computer to move back over to your tablet.
Et voila! You have your presets ready to go!
The presets are made with the different colour coats in mind, from greys, chestnuts, bays, blacks and more!
For examples of this preset see my latest Equestrian themed posts:
With this set of presets, I have included adjustments of exposure on each one making it even easier to edit your photos with Adobe Lightroom.
Please note that all the images are edited from canon raw files and exported to jpeg. Results for jpeg images may vary.
Welcome to Photography 101, the ultimate guide and introduction to Photography. I have spent many years as a professional, writing over 100 posts on tips, and tricks, as well as sharing my own photos and experiences. To celebrate my 10th year as Briony Molly Media, I thought about sharing all the basics in one long and epic post.
Photography 101
Photography 101
Introduction
Photography is an art form that has been around for centuries. From the first daguerreotypes to modern digital cameras, photography has evolved to become an integral part of our lives. Whether it’s capturing memories of special moments, documenting the beauty of the world around us, or creating works of art, photography is a powerful tool. It is used to express ourselves and connect with others.
So, what makes a good photograph? While there are many factors that contribute to a great photo, here are a few key elements to consider:
Composition: The way elements are arranged within the frame can make or break a photo. Whether it’s following the rule of thirds, using leading lines, or experimenting with negative space. The way you compose your photo can have a huge impact on its visual impact and storytelling.
Lighting: Light is one of the most important factors in photography. Whether it’s natural light or artificial. The way light falls on your subject can dramatically change the mood and feel of your photo. Experimenting with different lighting sources and techniques can help you achieve the look you want.
Focus: The focus of your photo is where your viewer’s eye will naturally be drawn. By controlling the focus, you can guide your viewer’s attention. Creating a sense of depth and dimension in your photos.
Post-processing: While it’s important to get the right shot in camera, post-processing can help you fine-tune your images and take them to the next level. From adjusting exposure and color to cropping and adding filters, there are many tools and techniques available to help you create the look you want.
Of course, these are just a few elements to consider when it comes to photography. Whether you’re just starting out or have been shooting for years. The most important thing is to keep experimenting, trying new things, and pushing yourself creatively. By doing so, you’ll not only improve your skills as a photographer. But also discover new ways to express yourself and connect with others through the power of images.
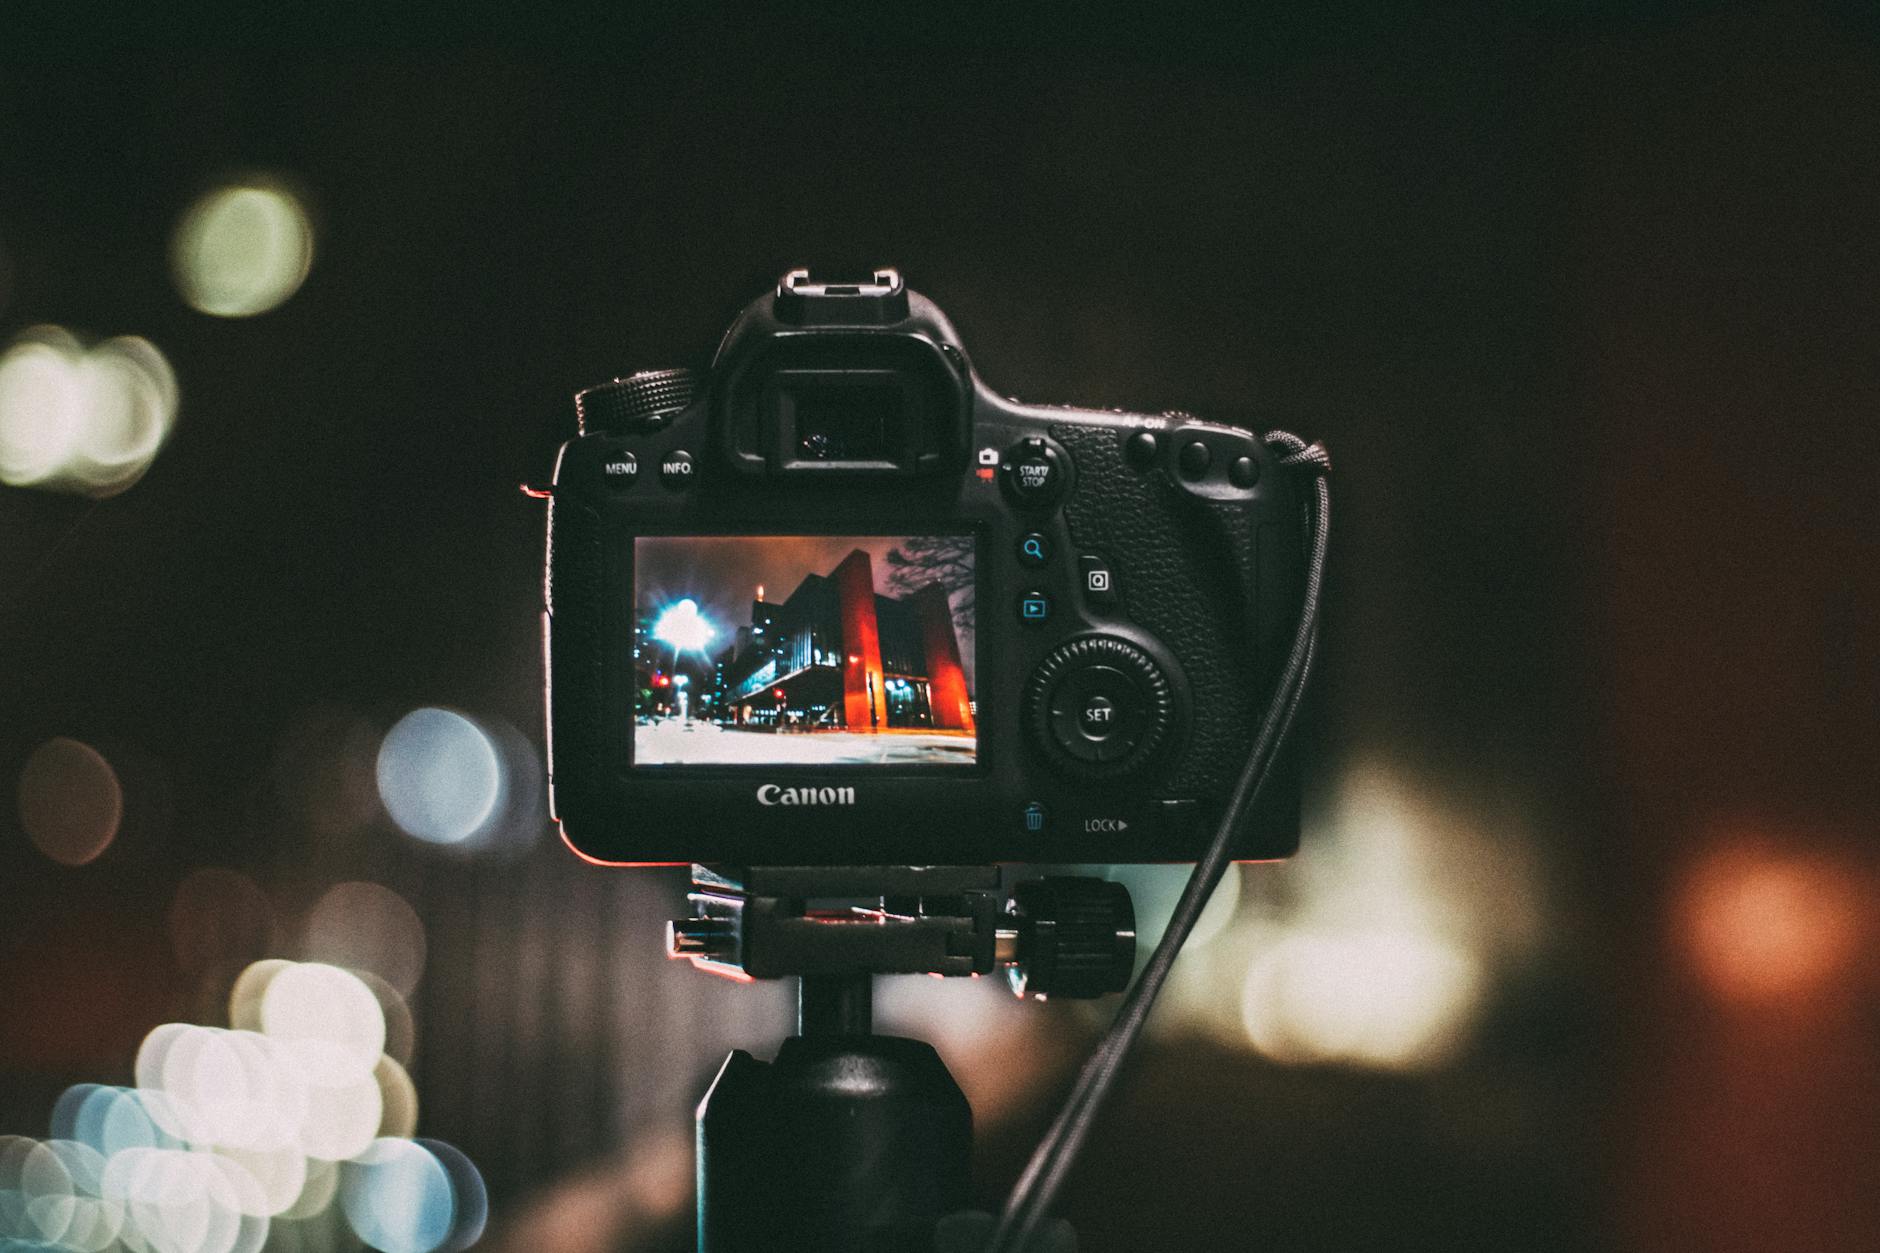
DSLR cameras have become a popular choice for amateur and professional photographers alike. They offer a wide range of features and flexibility that makes them ideal for capturing stunning images in a variety of settings. But with so many options available, it can be overwhelming to choose the right DSLR camera for your needs. Here are a few things to consider when shopping for a DSLR camera:
Sensor Size: One of the most important factors in a DSLR camera is the size of its sensor. A larger sensor allows for more light to be captured. Which results in higher-quality images with better dynamic range and less noise. Full-frame sensors are the largest available. However, they also tend to be more expensive. APS-C sensors are a popular choice for many photographers, offering a good balance of cost and image quality.
Megapixels: Megapixels aren’t the most important factor in image quality. Yet they can still play a role in the sharpness and detail of your photos. More megapixels means larger image files, which can be beneficial if you plan to print your photos in larger formats.
Lens Compatibility: Another important factor to consider when choosing a DSLR camera is lens compatibility. Many manufacturers offer their own line of lenses that are compatible with their cameras. There are also third-party options available. Make sure to research which lenses are compatible with the camera you’re considering.
Autofocus System: DSLR cameras offer a range of autofocus options. From basic single-point autofocus to more advanced systems that can track moving subjects. Consider the types of photography you plan to do and choose a camera with an autofocus system that fits your needs.
Video Capabilities: If you plan to shoot video with your DSLR camera, consider the resolution and frame rates it offers. Many modern DSLR cameras offer 4K video capabilities, as well as a range of frame rates for slow motion and fast action.
When choosing a DSLR camera, it’s important to find one that fits your specific needs and budget. By considering these factors and doing your research, you can find a DSLR camera that will help you capture stunning images and unleash your creativity as a photographer.
Understanding the different settings on your camera is essential to capturing great photos. Automatic modes can be convenient. But taking control of your camera’s settings can help you achieve the results you want and take your photography to the next level. Here are a few key settings to consider when shooting:
Aperture: The aperture controls the amount of light that enters the camera and affects the depth of field in your photos. A wide aperture (low f-number) will create a shallow depth of field. Blurring the background and keeping your subject in focus. A narrow aperture (high f-number) will create a deeper depth of field, keeping more of the image in focus.
Shutter Speed: The shutter speed determines how long the camera’s shutter stays open. Controlling the amount of light that enters the camera and how motion is captured in the image. A faster shutter speed (such as 1/1000th of a second) will freeze motion. A slower shutter speed (such as 1/30th of a second) will create motion blur.
ISO: ISO controls the camera’s sensitivity to light. A higher ISO setting can help you capture photos in low-light situations, but it can also introduce digital noise into the image. Lower ISO settings are ideal for bright conditions and can produce cleaner images.
White Balance: White balance controls the color temperature of the image, ensuring that whites appear white and colors are accurate. Different light sources (such as sunlight or fluorescent bulbs) can have different color temperatures, so adjusting the white balance can help you achieve the desired look for your photo.
Exposure Compensation: Exposure compensation allows you to adjust the overall brightness of your image. By increasing or decreasing the exposure, you can brighten or darken the image to better capture the mood and tone of the scene.
Experimenting with different combinations of these settings can help you achieve the look you want and capture stunning photos. Don’t be afraid to try new things and push your creativity as a photographer!
Next in Photography 101 is Composition. Composition is one of the most important elements of photography. It involves arranging the various elements of a photo in a way that is visually appealing and helps to communicate the message or story you want to convey. Whether you’re taking photos of landscapes, people, or still life, understanding the principles of composition can help you create powerful and impactful images. Here are a few key elements to consider when composing your photos:
Rule of Thirds: One of the most well-known principles of composition is the Rule of Thirds. This involves dividing your image into thirds both horizontally and vertically, and placing your subject at one of the intersecting points. This creates a more dynamic and visually interesting image than placing the subject directly in the center.
Lines and Shapes: Paying attention to the lines and shapes in your photos can help you create a sense of movement and flow. Diagonal lines, for example, can create a sense of motion and energy, while curves can add a sense of grace and fluidity.
Depth: Creating a sense of depth in your photos can add a greater sense of realism and immersion. This can be achieved through techniques. A shallow depth of field blurs the background. Or placing objects at varying distances from the camera to create a sense of foreground and background.
Framing: Using natural or man-made elements to frame your subject can add interest and context to your photos. This could be a tree branch framing a sunset, or a doorway framing a person.
Balance: Creating balance in your images can help to create a sense of harmony and stability. This can be achieved through techniques such as using symmetry or balancing the visual weight of different elements in the photo.
By paying attention to these principles of composition, you can create more engaging and impactful photos. Experiment with different techniques and find what works best for your particular subject and style.
Lighting can drastically affect the mood and tone of your images. Whether you’re shooting in natural light or using artificial lighting sources, understanding different lighting techniques can help you achieve the results you want. Here are a few key lighting techniques to consider:
Natural Light: Shooting in natural light can produce stunning results, but it’s important to be mindful of the quality of light. The golden hour (the hour after sunrise or before sunset) is often the best time to shoot, as the light is soft and warm. Shooting in direct sunlight can be challenging, but using a reflector or diffuser can help soften the light and create more even lighting across the subject.
Artificial Light: Using artificial lighting sources such as studio lights, speedlights, or even household lamps can give you greater control over the lighting in your photos. One common technique is the use of a key light, which is the main light source used to illuminate the subject. Fill lights can be used to fill in any shadows, while backlighting can create a dramatic effect by highlighting the subject’s silhouette.
High Key Lighting: High key lighting involves using bright, even lighting to create a light and airy feel. This technique is often used in portraits, fashion photography, and product photography to create a clean, bright image.
Low Key Lighting: Low key lighting involves using darker, more dramatic lighting to create a moody or mysterious feel. This technique is often used in portrait and still life photography to create a sense of drama or depth.
Rembrandt Lighting: Named after the famous Dutch painter, Rembrandt lighting involves using a key light to create a triangle of light on one side of the subject’s face. This technique can create a sense of depth and dimensionality, and is often used in portrait photography.
By understanding different lighting techniques and how they can be used to achieve different effects, you can take your photography to the next level and create stunning, professional-looking images.
Photo by Jessica Lewis ? thepaintedsquare on Pexels.com
Photo Editing
Photo editing is an essential part of modern photography. Whether you’re a professional photographer or just starting out, photo editing can help you enhance your images and create the exact look and feel you’re after. Here are a few key tips for effective photo editing:
Use the Right Tools: There are many photo editing software options available, from free options like GIMP to more advanced programs like Adobe Photoshop or Lightroom. Choose the software that works best for you and your needs, and take the time to learn how to use it effectively.
Adjust Exposure: Exposure is one of the most important elements of a great photo, and adjusting it can help you bring out detail and make your images more vibrant. Use tools like brightness, contrast, and highlights/shadows to adjust exposure and bring out the best in your images.
Crop and Straighten: Cropping and straightening can help you improve the composition of your images and remove any distracting elements. Use the crop tool to trim the edges of your photos and the straighten tool to align any crooked lines or horizons.
Colour Correction: Adjusting the colours in your images can help you achieve a specific look or feel. Use tools like saturation, hue, and temperature to adjust the colour balance and make your images more vibrant or subdued.
Sharpening: Sharpening can help you bring out detail and make your images look more crisp and clear. Use the sharpening tool to enhance edges and make your images more visually appealing.
Experiment with Filters and Effects: Filters and effects can add a creative touch to your images and help you achieve a specific style or mood. Experiment with different filters and effects to find the ones that work best for your images and personal style.
Remember, photo editing is a creative process and there are no hard and fast rules. Experiment with different techniques and find what works best for you and your images.
Overall
With practice and patience, you can create stunning, professional-looking photos that truly capture the essence of your subject. Take time to find your niche, and what you enjoy. Don’t beat yourself up that your images aren’t wonderful first time round!
What do you feel is the best tip for a beginner? Let me know in the comments!
Understanding camera terminology can be intimidating. When learning about photography for the first time as a fresh 16-year-old, the whole terminology behind the camera, and sitting in a lecture about how the camera works, did nothing for me. I wanted to be out there with my DSLR taking a photo and learning on the go. Not sitting learning the intricacies of what glass was first used for lenses and how it was made! So I have taken it upon myself to keep things a bit simpler when sharing the art of photography. Onto something that baffled me for a while, focal length – what is it?
What is it?
Focal length is the basic description of a lens. It is not a measurement of the actual length of a lens, instead, it represents a calculation (in mm) of an optical distance from the point where light rays converge to form a sharp image of an object to the sensor at the focal plane in the camera. The length calculation is determined when the lens is focused at “infinity.” That’s the scientific explanation of what focal length is. But what does that mean?
Lens length tells us how much of the scene will be captured (angle of view), and how large individual elements will be (magnification):
The human eye has an equivalent focal length of 45mm.
The longer the focal length, the narrower the angle of view and the higher the magnification.
The shorter the focal length, the wider the angle of view and the lower the magnification.
Using Focal Length
It’s all well knowing what it is, but how do you use it in a practical application?
Wide Angle Lenses Usually any lens under 50mm. These are practical for landscape photography, as well as interiors.
Prime 50mm Lenses A prime lens refers to a non-zoom/telephoto lens. It has a fixed focal length. 50mm is the closest to our eyesight. It is what most photographers use for portraits. This image has a length of 50mm at f/1.8.
Telephoto 70-200mm Lenses Telephoto or zoom lenses refer to lenses that can move between two focal points. A popular one is 70-200mm or 70-300mm.
Super Telephoto 150-600mm A length over the 300mm mark is popular for nature photography or sports. Personally, I used the Sigma 150-600mm for bird photography, as well as sports photography.
Finding The Focal Length
The length of your lens is marked on the front of the glass, as well as on the side of telephoto lenses. The information is stored within the metadata of your photos and available to see in editing programs, and the raw file itself.
What is it? (in Numbers)
If you want to get into the details of angles, here is a conversion of focal length to the angle of view:
Focal Length
Angle of View
12mm
122°
16mm
107°
24mm
84°
35mm
63°
50mm
47°
70mm
34°
90mm
27°
100mm
24°
200mm
12°
400mm
6°
It is important to remember that the angle of view can cause distortion of an image. This is why using the lens correction function is so important in editing, especially with images of people!
Now if you have any questions – feel free to comment or contact me.
Are you wondering how you can build a photography portfolio when you haven’t had any shooting time? Then keep reading and learn how to build a photography portfolio and attract paying clients.
Starting your new photography business can be intimidating, but it doesn’t have to be. Remember success is not an overnight thing, patience and kind words are key! That of course mixed with hard work and remembering to breathe.
Perfection may not exist, but progress certainly does. This is made with practice, which is the topic we will be covering today!
This article includes affiliate links.
How To Build A Photography Portfolio And Attract Clients
Whether it’s an online gallery, interactive PDF or an Instagram account, having a place to showcase your abilities in the art world is imperative to success. Getting a portfolio in the first place is a daunting task, but not impossible! Below are my tips to success:
Practice Makes Perfect
It’s time to put what you’ve learned into practice. All the photography basics learned from the internet, a course or friends: angles, lighting, location, communication, and posing etc. There are many things to consider as a photographer when you’re doing a photoshoot with a client.
Start off with friends and family. They know you and usually put you at ease. If you are looking to take more niche activities such as sport or wildlife, reach out to the local photographers and ask to shadow them for a day. This may be assisting on the sidelines, holding equipment such as lighting, but it is all experience and understanding on how certain shoots work.
After you’ve done a few test shoots, it’s time to practice with the public. Through this you’ll gain the experience of working with clientel, exprience the customer side of the business and also have a more varied portfolio. To get started on this, offer your services in local social media groups, or ask around!
You want a portfolio that showcases that you know what you’re doing – and the more galleries and photos you have, the better. However, it is important to remember that quality is better than quantity in this case. Only showcase work you are proud of.
Draw Inspiration From Others
Remember art class? Looking at great artists and copying works, objects and techniques? Photography is no different. There are so many fantastic photographers out there, both celebrated in art galleries and famous on instagram, but also not. Take time to scroll on Instagram, Pintrest, or your places of choice to see what works.
Here is a board of inspirational photographers I created to keep myself creative:
There are artists out there who say don’t copy others as it will stunt your individual aesthetic growth, so if you feel like that is not the route for you, don’t do it!It is your art, so do what you feel is best.
Develop Your Own Style
This is where studying other artists help. What do you like from others and what do you feel you can improve upon, or just make different. What feels like you in an image? Are you the kind of person who wants a warm cosy aesthetic? Crisp clean lines and sharp images? Intimate black and white blur?
What makes you stand out from all the other photographers? Your style, your personality, and the way you capture people and moments. Try to step outside the box of your photography comfort zone and try new settings and techniques! You may suprise yourself! By developing your own style, technique, aesthetic, and voice, you set yourself apart. People have something to remember you by, instead of being “just another photographer with pretty pictures”.
To have a consistent style once you have settled, try to use the same editing technique on the photos to keep your portfolio uniform.
Find Your Niche
Nowadays, everything is about specialising. Photography is no different. People look for specialists in their area: weddings, family portrait, sport, wildlife… you name it there is a speciality for it. Find what side you are most passionate about and hone your niche to this particular event.
However, this doesn’t mean you can’t branch out into different areas of photography. Take myself for instance. My passion is animals – in particular horses, so I focus my work on Equine photography and competitions. But I also enjoy other aspects and take bookings for portraits, product shoots, as well as enjoying taking my camera around for events.
“Your enjoyment and passion comes out int he quality of photos you take!“
Promote What You Love
If you find out you really enjoy doing sessions with couples onsite, guess what your portfolio should be based around? Couples in situe. Your enjoyment and passion comes out int he quality of photos you take!
When someone who’s looking for a couples photographer sees your portfolio, they clearly see right away what kind of photographer you are, and what you’re really good at. This allows the customer to imagine what it would be like to work with you and what product they can take away from it.
The customer really likes your style, and your work leads them to want to work with you. Or maybe they take a look at your portfolio and decide you’re not the photographer for them. In both scenarios, this is ok, because you want to attract your ideal clients and turn away the wrong ones.
Website Hosting
To get started with an online portfolio, you can use social media, or you can have a website. To help you get started WebHostUk is offering 25% off WordPress hosting. Use code NYW25 to get your discount or click the image below.
Get started on your web portfolio today with 24/7 customer support. WHUK is Fast, reliable, and affordable website hosting, perfect for European and UK-based individuals.
The most important advice I can part with is this:
Trust in your abilities, take time, and don’t expect immediate success overnight. Make sure that you continue to have fun and stay passionate about your work, even if this means taking extra time or asking for help.
Did you find this post on how to build a portfolio when helpful? Did I miss anything? Let me know in the comments below!
Elegance, style and balance. When looking at a well-designed piece, whether it is a logo, a website or a painting, it is all about the colours. In designing, picking colours for a piece is not necessarily just about what the designer thinks looks good. Countless amounts of research have shown that people are affected by exposure to colours. Whether it’s behavioural or emotional. It takes around 90 seconds for an individual to make a subconscious judgement on an item or person. 60-80% of the judgement is made up of colours perceived. This is the Importance of Colour Harmony.
The Importance of Colour Harmony
To really understand colour harmony, you need to look at the basics of colour theory. I remember back in High School when I took Art GCSE we looked at certain colour properties especially the colour wheel and saturation. Anyone who has had art classes or studied design already know the principles behind colour properties and in particular, the colour wheel.
Formed in the 1660s by Issac Newton, the colour wheel is built of the primary, secondary and tertiary colours, in a pragmatic way.
This colour wheel shows shades of pastels, midtones and brights as well as the pragmatic order of colour. It is split into different colour schematics. From simple monotone, warm and cold, and complimentary.
Colour Temperature
It’s easier to separate the colours into temperature and saturation. This is to describe their psychological effects so here are some of the emotions portrayed:
Hot – Aggressive and attention-grabbing. Normally seen on news-based websites, check out BBC, CNN, Reuters etc. They all lean towards warmer colours, whether it is their logos or web design.
Warm – Softer reds, oranges and yellows are more welcoming to us. Warmer tones are associated with inviting and welcoming designs, usually accent colours in waiting areas.
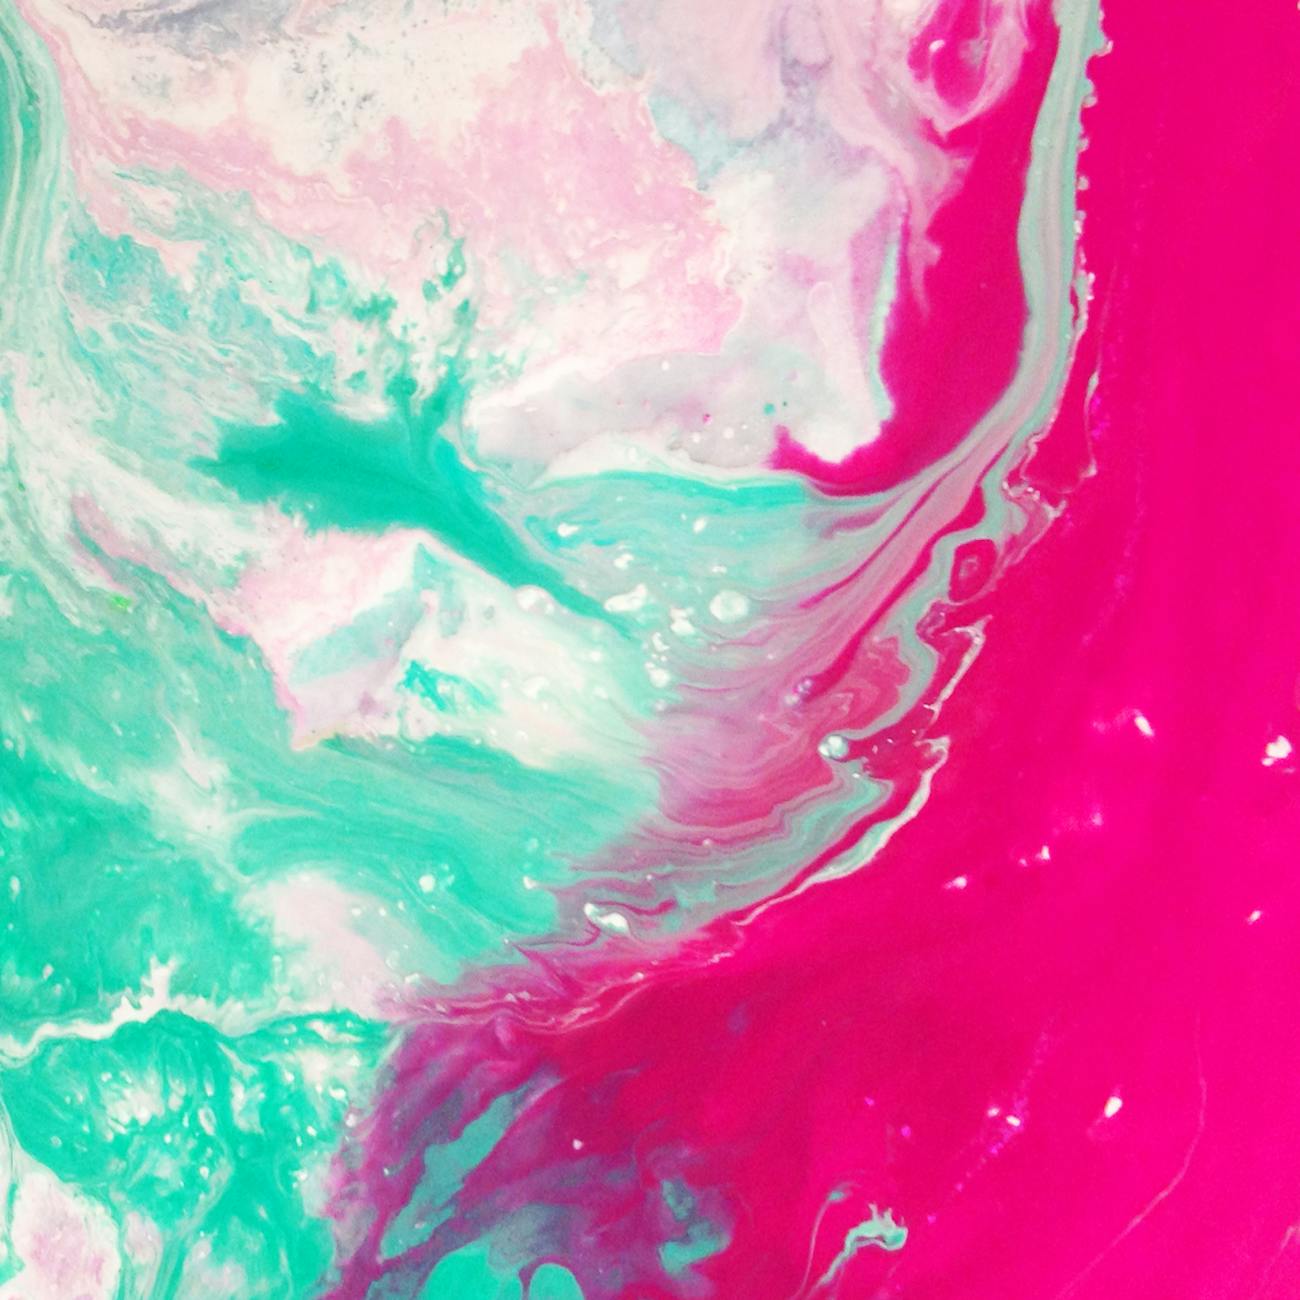
Cool– Purples, softer blues and greens give a meditative effect. Usually brings us back to nature with the association of relaxing flowers such as lavender.
Cold – Blues are associated with ice, water and freshness. Think of a combination of blue, turquoise and green. Cool colours are fresh. These colours are often used in packaging for laundry detergent and air fresheners.
Hues and Vibrancy
Pastels – Used to reflect the white space they are in. Often offices or hospitals will be painted in pastel shades to make the space look larger and more refreshing.
Pale – These colours are tints with a lot of white giving a faded effect. We often associate these colours with youth and innocence. Think to products for young children such as baby clothing and products. These colours are often associated with femininity. Most female products being pastel shades.
Brights – Usually the Primary colours or bold brights of secondary colours, think the use of these combinations by artists such as Mondrian or Andy Warhol. These are attention-grabbers and great for stand out products and websites.
Now we have the basis of temperatures, it is also good to know the break-down of individual colours:
Red – relates to energetic, passionate, action, ambition, love, anger, aggressive and determination. In some Asian cultures the colour red is lucky. In India, it is the colour of purity.
Orange–relates to adventurous, social, communicative, optimistic, enthusiasm, falsity, superficial and pessimism. Orange is also a sacred colour in many cultures. With the meaning of eternal happiness.
Yellow– relates to cheerfulness, fun, good-humored, confidence, originality, creativity, challenging, academic , wisdom, judgmental, impatient, impulsive, spiteful, cowardly and deceitful. In the middle east, yellow represents happiness and good fortune.
Green – relates to growth and vitality, renewal and restoration, self-reliance, nature, balance, possessive and materialistic, indifferent, envious, selfish, greedy, inconsiderate and calm. In western cultures, it is perceived as lucky. Whereas in Indonesia it is a forbidden colour. In the middle east, green represents youth, fertility and wealth.
Blue – relates to loyalty, trust, reliability, responsibility, conservatism, caring, contemplation, peaceful, depressed, passive, superstitious, predictable, aloof and frigid. It also promotes healing and safeguarding from evil in a lot of cultures.
Purple – relates to individual, creative and inventive, psychic and intuitive, humanitarian, mystery, fantasy, royalty, cynicism, arrogance, fraudulence. Purple is traditionally associated with royalty.And by association, wealth. In Brazil and Thailand, purple is associated with mourning and honouring the dead.
Brown – represents the down-to-earth, wholesome, practical, approachable, friendly, stable, structured, supportive, comforting, reliable, protective, dull, boring, frugal, materialistic, lack of humor, lack of sophistication, predictable and cheap.
Neutrals
Black – relates to comfort, strong, contained, formal, sophisticated, seductive, mysterious, pessimistic, secretive and withholding, conservative, serious and powerful. It represents masculinity in some African cultures and represents rebirth and mourning in the middle east.
White – represents innocence, purity, cleanliness, equality, complete, simplicity, immaculate, self-sufficient, pristine, sterile, stark, fastidious, empty, isolated, cautious, plain, distant and unimaginative. In Western cultures, the colour white symbolizes purity, peace, and cleanliness. In Asian cultures, such as China and Korea, white represents death, mourning. This can mean bad luck. It is traditionally worn at funerals.
Colour Schematics
Let’s move on to the basic colour schematics. These aren’t necessarily all the colour schematics there are, just the most frequently used ones with examples. Furthermore, you can use Adobe colour to create your own!
Monochromatic
One colour on the wheel with multiple shade gradients from dark to light.